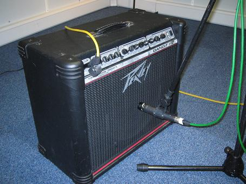
The past decade has presented numerous technological advances to the music industry. From the equipment used to record music to the vary devices that we replay the music with – music technology is advancing more to the common man. It’s growing, changing, and evolving for the best.
For example, in the past, a great guitar sound was reliant on owning a deluxe guitar amp, a quality microphone, and a decent studio or room. These days, with a simulation unit such as a Line6 pod, and a PC, musicians may digitally record a convincing guitar from their very own bedroom.
This proven, but highly undiscovered technique is a hidden gem in the guitar world. Guitarists no longer need an expensive amp to, no pun intended, create a rich sound. You also do not have to own/rent a studio to be able to crank that amp to the kind of volume needed to capture a classic guitar tone.
When it comes to miking a guitar amp, there are several different approaches and all of them are very valid. However, it is considered a standard practice to use a dynamic microphone. What is a dynamic microphone? Dynamic microphones are robust, cheap, do not require a separate power source, and are perfect for close proximity miking. Dynamic mics handle high pressure levels well.
Condenser microphones, on the other hand are sensitive, expensive, and need a third-party power source. They are also a very valid recording choice, but not appropriate for everyone’s budget.
TIP: The most commonly used dynamic mic models are the Shure 57 & Sennheiser MD421.
Once you purchase a dynamic or condenser mic, you may now experiment with various miking techniques. As previously mentioned, several different options exist. For example, you may:
- place a single, dynamic mic close to the speaker
- place a single, dynamic mic, 6 to 12 inches from the speaker
- incorporate multiple close, dynamic mics
- combine close and distant mics
- or, utilize front and back miking for “open-backed” combo amps
Again, there is no right or wrong answer. The miking technique depends on the sound desired and even professionals will change their method on a case-by-case basis.
Let’s examine some of the more popular techniques listed above.
Single Dynamic Mic CLOSE to Speaker

The microphone is placed directly at the front-center of the speakers center. Set the mic so it nearly, but does not touch the front grill. Varying where, along the radius the mic is placed, will affect the tonality of the recorded sound. Placing it in the middle will result in a bright, punchy sound, while the closer the mic gets to the edge, the darker the tonality will sound.
Single Dynamic Mic, 6 – 12 inches from Speaker

Just like the same technique demonstrated above, only this time the microphone is slightly further from its source. You will capture more room ambiance with this method. It will also result in a more developed sound.
Multiple Mics CLOSE to Speaker

Recording the amp with different mics and blending the sound will result in more dynamic, richer tone. Some engineers will place one dynamic mic dead-center to the speaker and another on the edge. Engineers will also tilt one of the mics slightly off-axis, as this will give another variation to the sound.
Combination CLOSE and DISTANT Mics

If you also own a decent condenser microphone, this method is ideal. Place the dynamic mic(s) close to the amp and the more powerful and sensitive condenser, position anywhere from 6 inches to a few feet away.
Front and Back Miking with “Open-Backed” Combo Amps

Place a dynamic close to the amp and then place a condenser close to the back of the amplifier. The blend will create a nice mix, but keep in mind that this is an advanced technique and could introduce phase issues remedied only by a skilled engineer.

This article is excellent and you have done a great job getting your point across in this content. I’m impressed with how well you have stated your points of interest with such interesting, original thinking.